

My key caps were a problem on my previous keyboard and so was my wrist pain. This together with having learned touch typing made me slowly look into split keyboards for several reasons. Having used the keyboard for some weeks now, I’m confident to say that I never want to go back to a normal keyboard. In this article I’d like to talk more about the whole process and the end result.
Why a split keyboard
So splitting the keyboard in two pieces allows you to put your hands further away from each other which helps with ergonomics. This is especially helpful for people struggling with wrist pain. Whilst looking up different mechanical keyboards I started coming across small keyboards, and somehow I got into a part of the internet talking about these split keyboards. At first I thought this was only for typing text as there aren’t enough buttons for all the stuff needed for programming. But I was wrong and learned about the layer system which these type of keyboards have.
The more I looked into these things, the more that I got sold on the idea of owning one. Ergonomics are better, you move your hands a lot less and you can position your hands where ever you feel most comfortable. For me my biggest thing that I wanted to achieve was no more wrist pain and being able to type and program comfortably.
Rabbit hole
The split keyboard community is quite active and dedicated. After owning one myself I do understand the “hype” around these things. There are so many different designs and so many people just creating what fits for themselves by making their own design/pcb’s/3D printed cases. It really is quite a creative hobby and it can be cheaper compared to normal mechanical keyboards whilst offering more ergonomics, customization and just future proofing as you build it yourself so you know how to fix it.
My decision
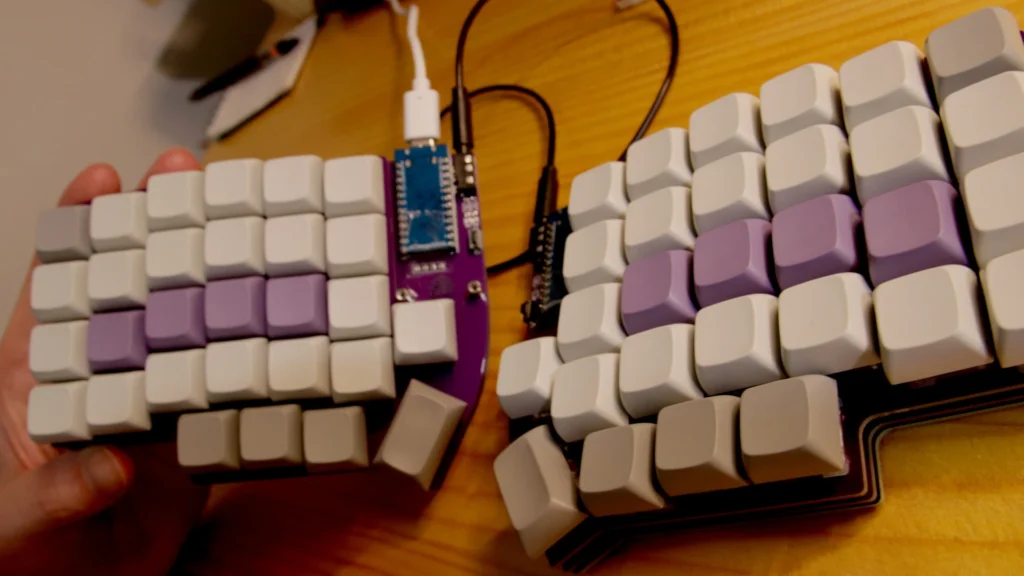
There are many different designs ranging from flat designs to 3D shapes, handwired keyboards to pre-built models, custom pcb’s, … the list goes on and on. I initially considered the Dactyl, a 3D style keyboard, but ultimately opted for the Lily58 due to its affordability and there is a very helpful build guide which goes into detail about how to build and setup the keyboard. This documentation and the number row were the main reasons why I went for this one
Getting the parts
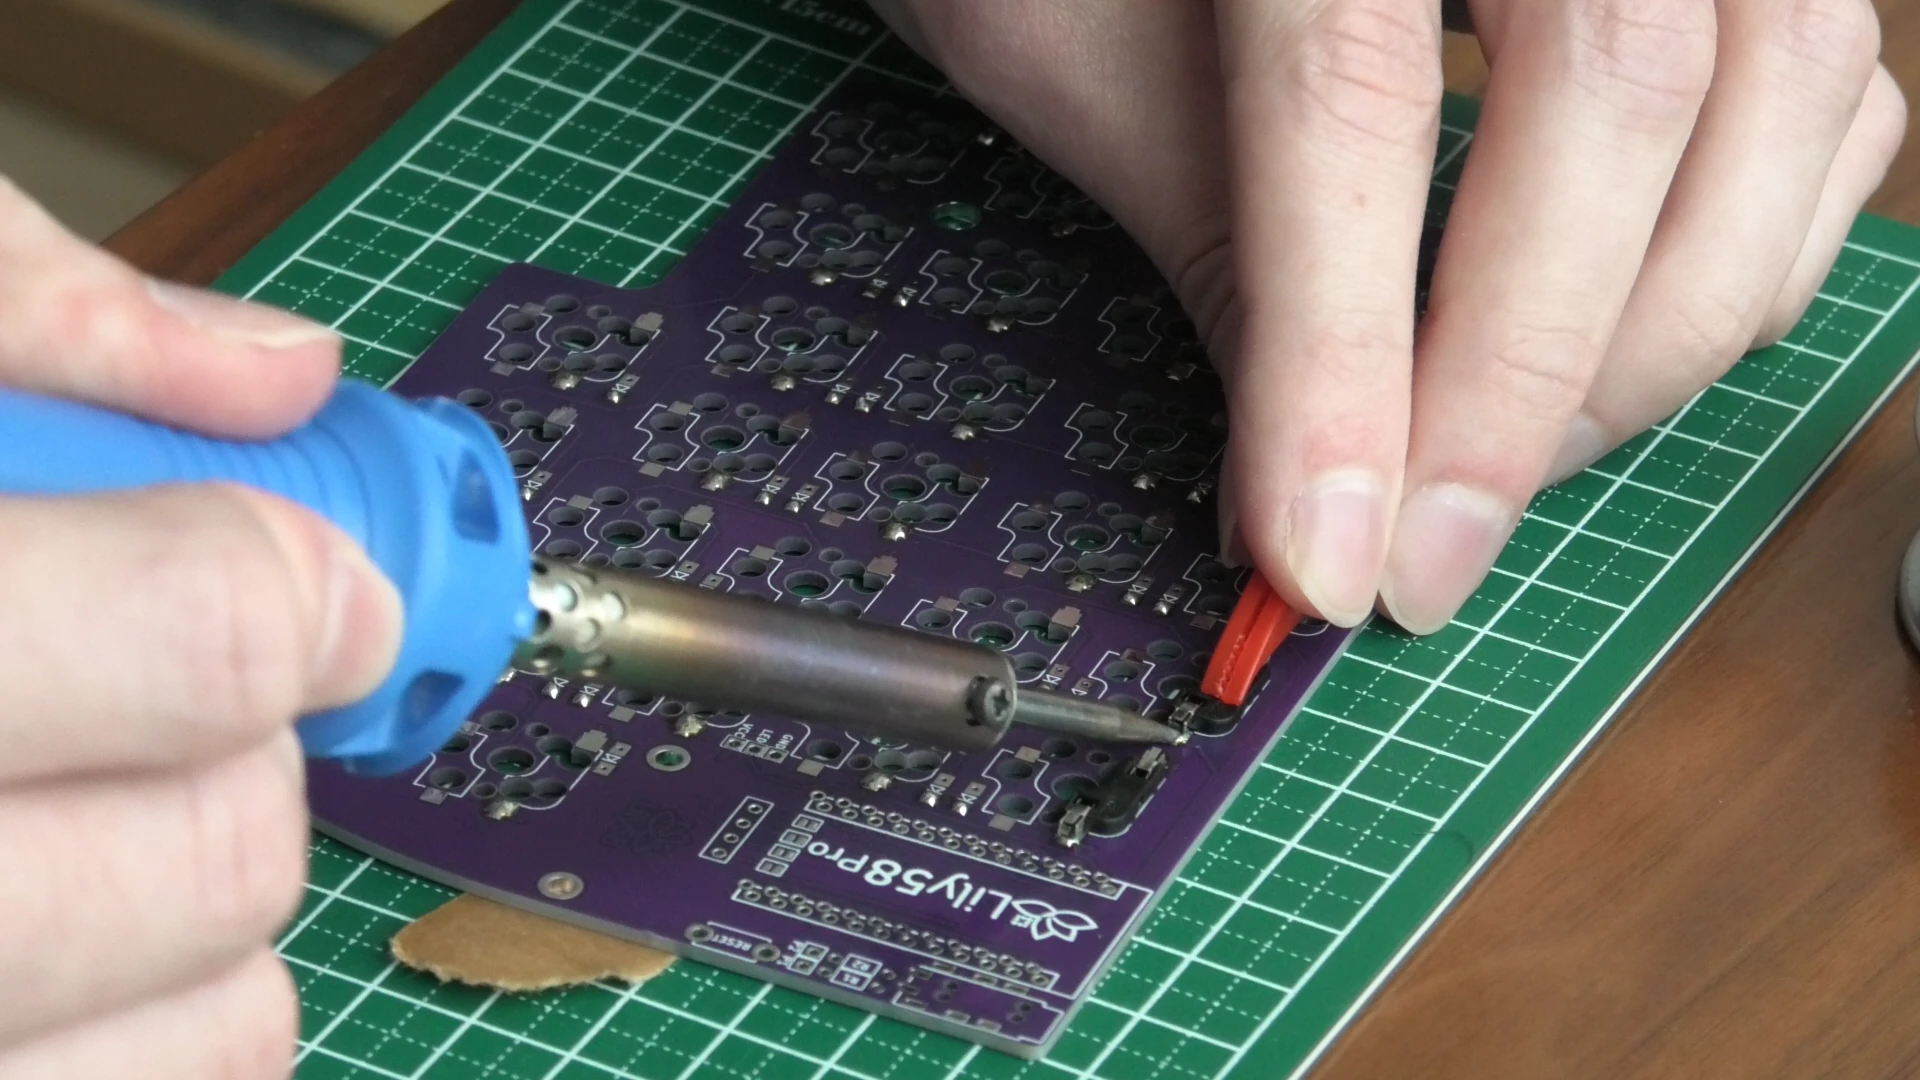
The parts weren’t that difficult to get, figuring out how to get the files necessary for printing the pcb’s was a bit more complicated. In the end it’s actually rather simple. Just install kicad, clone the Lily58 github repo and export plot files. When it asks you to refill, just agree. That’s it.
I found all the necessary parts through various online shops such as TalpeKeyboard, Yushakobo, and JLCPCB (for the pcb stuff). Another site I used for the soldering stuff was monotaro. Pricing was kind of important so I waited a long time for discounts to happen. In the end TalpeKeyboard saved me a ton of money, especially with their discount on switches. I could probably have gotten the switches of my previous keyboard but I don’t feel confident enough de-soldering them.
Build process
The build process involves soldering, for the people who don’t feel confident soldering: Don’t worry. The soldering went quite smooth and even though the parts are small, I didn’t struggle too much soldering everything. I have only soldered a couple of times before, nothing as big of a task as this though. Took me well over an hour to finish but was a lot less stressful then I thought it would be and was actually kind of relaxing.
While the soldering process was a bit challenging at times, the satisfaction of creating a custom keyboard by myself was high. Putting in the key switches and keycaps was a bit stressful and assembling the entire thing. Putting the software on it didn’t go as smoothly as the build guide was a bit outdated and I turned to the GitHub repo of QMK to flash the keyboard myself. After that it was just a lot of fidling with the layouts and getting things adjusted for me personally such as the timings for double presses and home row mods.
The experience
The whole experience was great, building it was satisfying, finding the parts was fun as well as I tried to go as low budget as possible. But the typing … I must admit that the first day I felt like giving up. I went for blanque keycaps which didn’t make the transition easier. But if I didn’t go for these keycaps I would continue to look at my keyboard instead of touch-typing.
So yeah, the first day went terribly … but how about day two? Well that day I was very unmotivated to use my pc because of the keyboard but still decided to try and type with this keyboard and try to get some programming time. After day three I felt kind of comfortable, my speed was still very slow, but I somehow got very quick the longer I used the keyboard. At this moment I am a lot faster on this keyboard compared to my previous one, something I kind of expected but was more of a “would be nice”.
Now I use the keyboard a lot smoother than a normal keyboard and I like to convenience of not moving my hands all over the place, it’s still some adjusting every now and then and the layers are still a bit of adjusting especially the layers which are activated by holding a key in the home rows. Also my enter if hold, changes the layer to my numbers and symbols which sometimes causes me to accidentally send my messages. ^^”
The cost
The cost of the keyboard came out to be 70 dollars when converting it from Japanese yen, and in Japanese yen 11 209 JPY, which is very low if you consider that custom mechanical keyboards here cost around 15000 jpy minimum, those often don’t even have the hot swap capable sockets. So overall for the price which I paid for them and the comfort they have given me, I can say nothing else then this was one of the best expenses I’ve ever made and I have no regrets. If I can nitpick, then I would say not having a home key with the little bump has been a bit inconvenient, but I’m thinking of buying a different keycap for f and j which would give those keys a different feel.